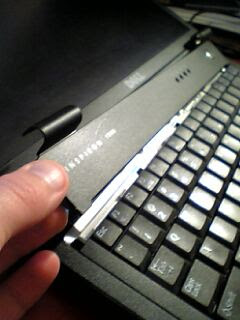
Removing the keyboard securing strip required a little more force than I would have expected. But then again, I think I broke a plastic tab doing it, maybe there was a gentler way to do it. It doesn't seem any worse for the wear after re-assembly, thankfully. Here is a super low-res, blurry photo to illustrate the strip removal:

When you take it off, you'll need to kind of pop it off of the hinge behind the monitor first. Then laying the monitor completely open, you can jimmy the rest open.
Oh, remember to remove the battery before doing any of this stuff. Oh, and don't take my word as gospel on any of this stuff, I'm just a guy who felt like voiding his warranty and couldn't find any better instructions on the Internet (the Dell manuals are lacking). Don't do any of this stuff if you aren't comfortable with basic static safety or don't have the right screwdrivers or haven't taken apart a desktop before or whatever.
Anyway, to get the rest of the case off, you'll need to remove the hard drive and find some secret screws in there. And note there are a couple screws under that keyboard strip:

Heck, there are screws freaking everywhere. My strategy was to unscrew every screw possible until stuff fell apart. It's good practice to keep track of all of the screws somehow. I had a separate piles for monitor screws (there are four), all of the internal screws, the hard drive related screws and all of the underneath screws. Screws!
When I got inside, I was a little overzealous and tried to remove the heatsink on the bus controller and broke the screws (more screws!). So be careful with that:

I was very excited to see that at the end of the whole deal, I didn't have any extra parts and that Windows booted up still and the keyboard still worked. Phew. Now we'll wait and see if the heatsink thing bites me later (I kinda taped it in place).
This was just a Sunday night exercise for me (either that or watch "The Surreal Life"), but if I ever need to replace the keyboard or fan or whatever, I guess I'll know how now.
4 comments:
Your blog and pictures really helped!
Glad my little post helped! Also glad to know that someone actually read it! Thanks for the note!
Great sense of humor holds up through the years. I am simply trying to reseat the monitor ribbon on mine, and scared as hell ...your blog eased my conscience...Screws everywhere! lol
Post a Comment